Running your own OpenVPN service, and why you would want to…
Dangers of Open WiFi

It is dangerous! See Dangers of Open WiFi.
Solution: OpenVPN


There is a solution. Shucks, there are two solutions!
- One solution is OpenVPN on a stand-alone computer.
- Some consumer-grade routers come with OpenVPN built-in.
Wondering how a VPN keeps your data private? See: How Does a VPN Work?
Is This Gonna Cost a Bundle?
![]()
- No. See Introducing the Raspberry Pi.
Authorities, Keys, and Certificates Explained
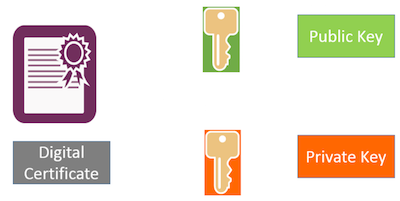
If you’re not clear on Certificate Authorities, Keys, and Certificates, read this.
Keys, Certificates, Certificate Authorities, and Your U.S. Passport
Your server will not have a list of authorized users, yet only authorized users can use your server! How is this possible? It is sort of like the State Department, your passport, and the INS.
See Keys, Certificates, Certificate Authorities, are Like Your U.S. Passport.
Master List of Keys and Certificates
OpenVPN uses a lot of keys and certificates.
Generate Your Certificate Authority, Certificates, and Key
Before you can run your VPN, you’re going to need create keys and certificates.
Install the Operating System

The OS for the Raspberry Pi is called Raspbian. It is based on the Debian distribution of Linux. If you’re familiar with Ubuntu, you’ll feel right at home.
For install instructions, see Basic Raspberry Pi Setup - Installing Raspbian
You don’t have to use a Raspberry Pi and Raspbian. If you happen to have a Linux server at home, any Debian-based distribution will be similar. Other distributions will have differences in the commands to install packages and/or file locations, but the concepts will be the same.
Of course, if you’re setting up OpenVPN on a consumer-grade router which bundles it, your router already has its OS.
Install OpenVPN and Configure the OpenVPN Server
If you’re using a Pi, the next step is to set up an OpenVPN server on your Pi. You can use PiVPN but that means you’re trusting the folks at pivpn.io. I don’t know them. They’re probably wonderful people who never make a mistake. OpenVPN is pretty thoroughly vetted, but PiVPN somewhat less so. I’m going to set up OpenVPN on my own.
- See Install and Configure an OpenVPN Server, if you’re using a Pi.
- See Set-up OpenVPN using Asus, if you’re using an Asus router.
Installing Clients
Once you’ve done that, download and install your OpenVPN client.
- For Windows, follow these Windows instructions.
- For Android, follow these Android instructions
- For Mac, go to the Tunnelblick site and download and install Tunnelblick (if you don’t have it already). It is the only sensible VPN client for Mac.
- For Linux, here’s a tutorial.
- For iOS, you’re on your own. I haven’t had to do this one yet.
Configuring Clients
You’ve got the server configured and you have key files for the clients. You still need configuration files for the clients. These files must line up with the server configuration. For example, if you told the server to use TCP instead of UDP, you have to tell the client the same. Likewise for which encryption algorithm to use, etc.
-
Build Configuration Files for Your OpenVPN Clients
- In order to bring up a client, transfer the .ovpn file for that client from ~/easy-rsa/keys (on the machine where you built your keys). To transfer the file you can use scp, sftp, sneakernet, etc. You should choose a secure method because you don’t want someone else to get that file.
- Import the .ovpn file into your OpenVPN client. This varies by client.
- For Tunnelblick: Just open (double-click) a .ovpn file and Tunnelblick will load it. Rename the loaded configuration to something like homeaddress-raspivpn-kevin-mac or homeaddress-routervpn-kevin-mac.
- For other clients, you’ll have to poke around in the menus or RTFM for your client. Most of them have something like “File » Import Configuration”. Once you import it, delete any temp copies. You *really want to keep this file secure because it will grant anyone who has it access your VPN.
Open Your Firewall on Your Pi

You can’t connect to a VPN on your Pi if your firewall blocks access. Your Pi came with a built-in firewall. We need to open the necessary ports on your Pi.
See Open Your Firewall on Your Pi.

Open a Pinhole In Your Gateway
You probably have a telco-provided router. If you’re with AT&T, it is called a “Residential Gateway.” If you get your Internet from a cable company, it is called a “Cable Modem.” Regardless of what it is called, it is a router (among other things). You’ll need to configure it so that when a computer outside your LAN tries to get into your LAN, the router forwards traffic to your Pi. The way you do this is probably to point your browser to your router’s IP address. You may have to call your ISP and ask them how. I can tell you that on a 2Wire residential gateway, you do this by browsing to http://192.168.1.254 and looking under ‘Firewall’.
Port 1194 is the standard for OpenVPN, and I use that port internally. However, for the EXTERNAL port I like to use 443. Occasionally, I run into a hotel or an open WiFi that blocks non-browser traffic. By using port 443, the router thinks my VPN is just a browser’s https traffic.
However you do it, configure your telco router to send incoming traffic that hits port 443 to get passed to port 1194 on your Pi.
Test Your Connection
- Copy one of the “bogus” .ovpn files from the server to your local workstation.
- Import the .ovpn file into your local OpenVPN client
- Connect.
- Debug
- Run a traceroute to google.com. The first hop should be 10.16.0.1. If it isn’t that, your VPN client isn’t sending all traffic via the VPN. Fix it.
Practice Revoking a Certificate

Sooner or later, someone is going to lose a laptop or a cell phone and you’ll need to revoke his/her certificate so that the thief can’t use your VPN. When you put a .ovpn file on an client, be certain that client has a good password (e.g. a good screen-lock PIN on your cell phone or a strong Windows password on your Windows PC - with a short timeout on the lock-when-idle.)
See Practice Revoking a VPN Certificate.
Making UDP Work Too
I’d like to have a UDP instance too. As I’ve mentioned, in theory, running a VPN over UDP should work better than running it over TCP. When you have TCP layered over TCP, if you run into network latency, you can have both layers retransmitting, and the upper layer can exacerbate the latency of the lower layer with the extra traffic.
See Build a UDP VPN Config File from TCP Config.
Auto-connecting
You may decide that you’d like your cell phone or computer to automatically connect to your VPN. Conceptually, this is easy – if I’m connected to WiFi and I’m not on my home network, start my VPN. I had this set up for my phone and my Macbook but I never really got it as smooth as I wanted. If you’re interested in pursuing this:
- For Android, the tool is Tasker. See Use Tasker to Auto-enable VPN on Android.
- For Mac, the tool you want is ControlPlane.
- It allows you to define rules such as, “If I’m connected to this Wifi network and I have these GPS Coordinates, then stop Tunnelblick; otherwise, start Tunnelblick.
- Then, you tell Tunnelblick that it should auto-start your home VPN whenever it starts.
- This works pretty well, but every time I wake my Macbook at home, it stops Tunnelblick. I do so much tinkering that I didn’t really want this.
- To make Windows auto-connect, I couldn’t find anything off the shelf. You’ll have to do some scripting with AutoHotkey, Ruby, Python, etc.
- iOS? So sad. Apple won’t let software auto-connect you. It’s a sandbox limitation.
Grant Dad Access to the Home LAN When He’s Out of Town

There’s another use-case for VPN, besides tunneling on an unsafe WiFi. When you’re out of town, whether you’re in a hotel or visiting Grandma, you might like to fetch a file from your home LAN. Wouldn’t it be nice to to connect to your home LAN?
In our walk-through above, we set up your VPN server so that everyone on your VPN has access to your home LAN. But maybe you don’t trust your kid to keep his phone safe. Remember: If he loses that cell phone, he loses one of the keys to your VPN and if someone nefarious finds the key, he can connect to your VPN.
See Grant Only Dad Access to the Home LAN
Wrap-up

- We took a $50 compter or an $80 router.
- We installed a free Linux operating system.
- We installed OpenVPN.
- We used EasyRSA to generate our keys and certificates.
- We installed a VPN client on our clients.
- We imported the client configuration file.
- We discussed auto-connect options.
- We granted special permissions to a special user.
Learn More / Other Options
- If you want more info, this book is an option.
- It looks like this guy wrote a book which tells how to do the same thing as this blog posting. I haven’t read it, but if you need more details than I provide, it is an option.
- This post describes using an Amazon server instead of a Raspberry Pi.
- You can actually purchase the commercial OpenVPN Access Server in the AWS Marketplace.
- Note that with AWS, you can set up a privacy-VPN, but it clearly isn’t going to let you access your home LAN!
- Free lasts for a year. Then you have to start paying for your AWS. It is surprisingly cheap, if you’re a lightweight user. Consider pro/con of using comp-lzo (trading CPU time of compression vs network bandwidth).