Write Raspbian to SD Card from Linux

There is a perfectly good how-to at https://www.raspberrypi.org/documentation/installation/installing-images/linux.md.

Once you follow that, be sure to create an empty file named “ssh” in /boot on the SD Card. This will enable you to connect to your Pi via SSH, even if you’re running a “headless” Pi with no monitor.


Return to Basic Raspberry Pi Setup

How Does a VPN Work?

  • Topics: Point-to-point tunnel from laptop to VPN server, Redirect your DNS through VPN

The short form is that a VPN securely transports your data from one point to another. It’s not about end-to-end. It’s about point-to-point.

When your laptop wants to talk with a host computer via the Internet (using something called “IP protocol”), it sends a data frame via WiFi or a wired connection. The frame travels from router to router via a mostly direct route until it arrives at the computer you’re trying to talk with. Unless it is encrypted, if you send “myUserID” and “myPassword”, every router along the way can see “myUserID” and “myPassword” in the frame. This is not good if you’re in a coffee shop where someone has tampered with the router.

If you set up a VPN (Virtual Private Network) server on your home network, and you use this VPN when you’re on the WiFi at the coffee shop:

  • Your laptop encrypts the frame.
  • Your laptop sends the encrypted frame across the Internet to your VPN server. The frame is encrypted, so even if the WiFi is nefarious, it can’t see your data or tamper with it.
  • The encrypted frame is decrypted by your VPN server.
  • The VPN server sends the original frame across the Internet to your original host, as if you were surfing from home.

One big risk of using a WiFi at Bob’s Coffee and Hacking Emporium is that Bob might tamper with DNS, so that when you think you’re browsing to http://myBigBank.com you might wind up at http://myBigHacker.ru. With a VPN, you can have your DNS traffic passed through the same encrypted tunnel, to use the same DNS server you use when you’re at home. (This is probably the DNS provided by your ISP.)


Return to Safe Surfing at Starbucks

Dangers of Open WiFi

  • Topics: HTTP login pages, Open WiFi (non-WPA/WPA2), cell apps using HTTP, DNS attacks

Open WiFi Is Scary

If you go to Starbucks (or McDonalds or Chick-fil-A or…) and you connect to WiFi without entering a password, your WiFi traffic is broadcast to all WiFi clients within range. Using commonly available tools, anyone can capture web pages you visit, etc. HTTPS protects some of your traffic, but some sites use HTTPS solely for authentication, and many apps send unencrypted data. For sites which use HTTPS solely for authentication, it is possible for a hacker to capture your cookies and masquerade as you.

If the access point uses WPA and requires a password to access WiFi then your WiFi traffic is encrypted, but what if the WiFi access point itself is malicious, and it captures your traffic?

And those cheap (or free) cell phone apps… Their developers probably didn’t spring for an HTTPS certificate, so they’re probably sending data in the clear. “So what?” you ask. I don’t care if somebody captures my fitness tracker data. Fair enough. But did you use the same ID/password on your tracker and on Facebook? Oops! You just shared your password with anyone in the cafe who cares to listen.

  • Multiple studies have found cell apps that fail to implement SSL/TLS correctly.

And what if the WiFi router is serving up bogus DNS data? If you browse to www.myBank.com, you expect to be sent to the server for myBank.com. If DNS on the router has been tampered with by a hacker, you could be sent to a site which looks like your bank, but is actually capturing ID/password data. (This is trivially easy to do.) A compromised router is also a risk if you are using wired Ethernet at a hotel.

Bottom Line

If you want to be sure that the sleazeball in the next booth/room can’t see your data, you need to be using a VPN to ensure that every byte is encrypted and you want to be using the same DNS servers you use when you surf from home.


Return to Surf Safe at Starbucks

Build Configuration Files for Your OpenVPN Clients

Download a Config File From Your Router, If You Are Using a Router VPN Server

If you are using a router as your VPN server,

  • Browse to your router
  • Navigate to the VPN page » OpenVPN Servers tab » and click on Export.
  • This will download a client config file. The config file has a place for you to paste a client certificate and a client key. Fetch them from your easy-rsa/keys_router folder, and use copy/paste to add their content to the downloaded .ovpn file.
  • Continue editing your downloaded .ovpn file and:
    • Edit the “remote x.x.x.x 1194” line and replace x.x.x.x with your external IP address or your external DNS name.
  • You’ve now got a fully usable client config file.
  • Don’t forget to update your readme.txt in your easy-rsa/keys_router folder, where you track to whom you assigned each certificate.
  • If you are using a router as your VPN server, you’re done with this page. Return to Surf Safe at Starbucks

Build Config Files If You Are Using a Pi VPN Server

Building a config file is hard. Here’s a script to help build it.

On your key generation machine, put this in a file named ~/Packages/easy-rsa/build-client-config.sh (maybe just ~/easy-rsa for you). It is based on a script found here, written by Eric Jodoin. Be sure to edit EXTERNALIP.

#!/bin/bash
DEFAULT="Default.txt"
FILEEXT=".ovpn"
KEY=".key"
CA="ca.crt"
TA="ta.key"
NAME="${1%.*}"

# Substitute your external IP address or the DNS name for the external IP address of your VPN server.
# Consider registering a domain name specifically for this purpose.  If your IP address changes, you'll wish you had.
# TODO: CHANGEME - Your external IP or DNS name here
EXTERNALIP="vpn.example.com"

if [ -z "${NAME}" ]; then
    echo "Please enter an existing Client Name:"
    read NAME
fi

while [ ! -f $NAME.crt ] ; do
    echo "[ERROR]: Client Public Key Certificate not found: $NAME.crt"
    echo "Please enter an existing Client Name:"
    read NAME
done

if [ ! -f $NAME$KEY ]; then
    echo "[Error]: Client Private Key not found: $NAME$KEY."
    exit -1
fi

if [ ! -f $CA ]; then
    echo "[ERROR]: CA Public Key not found: $CA"
    exit -1
fi
echo "CA public Key found: $CA"

if [ ! -f $TA ]; then
    echo "[ERROR]: tls-auth Key not found: $TA"
    exit -1
fi

#Ready to make a new .opvn file - Start by populating with static content.
#Make sure that you get the EOF outdented all the way
cat <<-EOF > $NAME$FILEEXT
    client
    dev tun
    proto tcp
    resolv-retry infinite
    nobind
    persist-key
    persist-tun
    mute-replay-warnings
    ns-cert-type server
    key-direction 1
    cipher AES-256-CBC
    auth SHA256
    comp-lzo no
    verb 1
    mute 20
EOF
echo "remote $EXTERNALIP 443" >> $NAME$FILEEXT

#append the CA Public Cert
echo "<ca>" >> $NAME$FILEEXT
cat $CA >> $NAME$FILEEXT
echo "</ca>" >> $NAME$FILEEXT

#append the client Public Cert
echo "<cert>" >> $NAME$FILEEXT
cat $NAME.crt | sed -ne '/-BEGIN CERTIFICATE-/,/-END CERTIFICATE-/p' >> $NAME$FILEEXT
echo "</cert>" >> $NAME$FILEEXT

#append the client Private Key
echo "<key>" >> $NAME$FILEEXT
cat $NAME$KEY >> $NAME$FILEEXT
echo "</key>" >> $NAME$FILEEXT

#append the TA Private Key
echo "<tls-auth>" >> $NAME$FILEEXT
cat $TA >> $NAME$FILEEXT
echo "</tls-auth>" >> $NAME$FILEEXT

echo "Done! $NAME$FILEEXT created."

Note: Setting “comp-lzo no” does not permanently disable comp-lzo. It merely makes no compression the default behavior for the client. You can override this by pushing comp-lzo from the server. Confusingly, if you specify nothing about comp-lzo, it is disabled and the server cannot override it with a push. i.e. In order to allow the server to enable comp-lzo, you must first disable it (or enable it) on the client!

Mark it executable:

chmod ugo+rx ~/easy-rsa/build-client-config.sh

Note: Before proceeding you must load the easy-rsa environment variables and set your working directory to /home/pi/easy-rsa-keys. If you defined an alias as suggested here, you can execute these bash statements (choosing keys_raspivpn, when asked):

easy-rsa
cd $KEY_DIR

You’ll need to run build-client-config.sh script for each client key. Because all of your client keys are named user-something.key, you can run:

for f in user-*.key ; do ~/Packages/easy-rsa/build-client-config.sh $f ; done

When you’re done, you’ll have a collection of .ovpn files – one for each client key. These files contain your keys, your certificates, and the settings necessary to access your VPN. Guard them. Keep them safe!

Create a readme.txt file in your ~/easy-rsa/keys directory to track who gets what .ovpn file. For example, you might put something similar to the following in your readme.txt:

  • Dad’s Macbook = user-key1.ovpn
  • Dad’s iPhone = user-key2.ovpn
  • Mom’s Laptop = user-key3.ovpn
  • Billy’s Android = user-key4.ovpn

Return to Surf Safe at Starbucks

Write Raspbian to SD Card from Windows

  • Download Win32DiskImager
  • Unzip it to Win32DiskImager.exe
  • Right-click Win32DiskImager.exe and select Run as Administrator
  • Select the image file you extracted (2017-01-11-raspbian-jessie-lite.img)
  • Select the drive letter of the SD card in the device box. Be careful! You don’t want to write to C:\
  • Click Write and wait for it to finish
  • Create an empty file named “ssh” in the \boot folder of the drive (via right-click in Windows Explorer, create a .txt file, and rename it.)
  • Right-click on the SD card drive in Windows Explorer and click Eject.

Return to Basic Raspberry Pi Setup

Write Raspbian to SD Card from Mac

  • Run:

      diskutil list
    
  • Review the output. Identify the device for your SD. On mine, it was “disk2”. Substitute 2 (or your digit) for # below.
  • Run:

      diskutil unmountDisk /dev/disk#
    
  • Run (this takes a few minutes):

      sudo dd bs=1m if=2017-01-11-raspbian-jessie-lite.img of=/dev/rdisk#
    
  • Create a “ssh” file on the SD card to enable ssh on first boot and un-mount the SD card:

      > /Volumes/boot/ssh
      sudo diskutil eject /dev/rdisk#
    

Return to Basic Raspberry Pi Setup

Surf Safe at Starbucks

Running your own OpenVPN service, and why you would want to…

Dangers of Open WiFi

It is dangerous! See Dangers of Open WiFi.


Solution: OpenVPN

There is a solution. Shucks, there are two solutions!

Wondering how a VPN keeps your data private? See: How Does a VPN Work?


Is This Gonna Cost a Bundle?


Authorities, Keys, and Certificates Explained

If you’re not clear on Certificate Authorities, Keys, and Certificates, read this.

Keys, Certificates, Certificate Authorities, and Your U.S. Passport

Your server will not have a list of authorized users, yet only authorized users can use your server! How is this possible? It is sort of like the State Department, your passport, and the INS.

See Keys, Certificates, Certificate Authorities, are Like Your U.S. Passport.


Master List of Keys and Certificates

OpenVPN uses a lot of keys and certificates.


Generate Your Certificate Authority, Certificates, and Key

Before you can run your VPN, you’re going to need create keys and certificates.


Install the Operating System
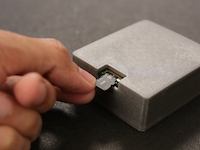
The OS for the Raspberry Pi is called Raspbian. It is based on the Debian distribution of Linux. If you’re familiar with Ubuntu, you’ll feel right at home.

For install instructions, see Basic Raspberry Pi Setup - Installing Raspbian

You don’t have to use a Raspberry Pi and Raspbian. If you happen to have a Linux server at home, any Debian-based distribution will be similar. Other distributions will have differences in the commands to install packages and/or file locations, but the concepts will be the same.

Of course, if you’re setting up OpenVPN on a consumer-grade router which bundles it, your router already has its OS.


Install OpenVPN and Configure the OpenVPN Server

If you’re using a Pi, the next step is to set up an OpenVPN server on your Pi. You can use PiVPN but that means you’re trusting the folks at pivpn.io. I don’t know them. They’re probably wonderful people who never make a mistake. OpenVPN is pretty thoroughly vetted, but PiVPN somewhat less so. I’m going to set up OpenVPN on my own.


Installing Clients

Once you’ve done that, download and install your OpenVPN client.


Configuring Clients

You’ve got the server configured and you have key files for the clients. You still need configuration files for the clients. These files must line up with the server configuration. For example, if you told the server to use TCP instead of UDP, you have to tell the client the same. Likewise for which encryption algorithm to use, etc.

  • Build Configuration Files for Your OpenVPN Clients

    • In order to bring up a client, transfer the .ovpn file for that client from ~/easy-rsa/keys (on the machine where you built your keys). To transfer the file you can use scp, sftp, sneakernet, etc. You should choose a secure method because you don’t want someone else to get that file.
    • Import the .ovpn file into your OpenVPN client. This varies by client.
      • For Tunnelblick: Just open (double-click) a .ovpn file and Tunnelblick will load it. Rename the loaded configuration to something like homeaddress-raspivpn-kevin-mac or homeaddress-routervpn-kevin-mac.
      • For other clients, you’ll have to poke around in the menus or RTFM for your client. Most of them have something like “File » Import Configuration”. Once you import it, delete any temp copies. You *really want to keep this file secure because it will grant anyone who has it access your VPN.

Open Your Firewall on Your Pi

You can’t connect to a VPN on your Pi if your firewall blocks access. Your Pi came with a built-in firewall. We need to open the necessary ports on your Pi.

See Open Your Firewall on Your Pi.


Open a Pinhole In Your Gateway

You probably have a telco-provided router. If you’re with AT&T, it is called a “Residential Gateway.” If you get your Internet from a cable company, it is called a “Cable Modem.” Regardless of what it is called, it is a router (among other things). You’ll need to configure it so that when a computer outside your LAN tries to get into your LAN, the router forwards traffic to your Pi. The way you do this is probably to point your browser to your router’s IP address. You may have to call your ISP and ask them how. I can tell you that on a 2Wire residential gateway, you do this by browsing to http://192.168.1.254 and looking under ‘Firewall’.

Port 1194 is the standard for OpenVPN, and I use that port internally. However, for the EXTERNAL port I like to use 443. Occasionally, I run into a hotel or an open WiFi that blocks non-browser traffic. By using port 443, the router thinks my VPN is just a browser’s https traffic.

However you do it, configure your telco router to send incoming traffic that hits port 443 to get passed to port 1194 on your Pi.


Test Your Connection

  • Copy one of the “bogus” .ovpn files from the server to your local workstation.
  • Import the .ovpn file into your local OpenVPN client
  • Connect.
  • Debug
  • Run a traceroute to google.com. The first hop should be 10.16.0.1. If it isn’t that, your VPN client isn’t sending all traffic via the VPN. Fix it.

Practice Revoking a Certificate

Sooner or later, someone is going to lose a laptop or a cell phone and you’ll need to revoke his/her certificate so that the thief can’t use your VPN. When you put a .ovpn file on an client, be certain that client has a good password (e.g. a good screen-lock PIN on your cell phone or a strong Windows password on your Windows PC - with a short timeout on the lock-when-idle.)

See Practice Revoking a VPN Certificate.


Making UDP Work Too

I’d like to have a UDP instance too. As I’ve mentioned, in theory, running a VPN over UDP should work better than running it over TCP. When you have TCP layered over TCP, if you run into network latency, you can have both layers retransmitting, and the upper layer can exacerbate the latency of the lower layer with the extra traffic.

See Build a UDP VPN Config File from TCP Config.


Auto-connecting

You may decide that you’d like your cell phone or computer to automatically connect to your VPN. Conceptually, this is easy – if I’m connected to WiFi and I’m not on my home network, start my VPN. I had this set up for my phone and my Macbook but I never really got it as smooth as I wanted. If you’re interested in pursuing this:

  • For Android, the tool is Tasker. See Use Tasker to Auto-enable VPN on Android.
  • For Mac, the tool you want is ControlPlane.
    • It allows you to define rules such as, “If I’m connected to this Wifi network and I have these GPS Coordinates, then stop Tunnelblick; otherwise, start Tunnelblick.
    • Then, you tell Tunnelblick that it should auto-start your home VPN whenever it starts.
    • This works pretty well, but every time I wake my Macbook at home, it stops Tunnelblick. I do so much tinkering that I didn’t really want this.
  • To make Windows auto-connect, I couldn’t find anything off the shelf. You’ll have to do some scripting with AutoHotkey, Ruby, Python, etc.
  • iOS? So sad. Apple won’t let software auto-connect you. It’s a sandbox limitation.

Grant Dad Access to the Home LAN When He’s Out of Town

There’s another use-case for VPN, besides tunneling on an unsafe WiFi. When you’re out of town, whether you’re in a hotel or visiting Grandma, you might like to fetch a file from your home LAN. Wouldn’t it be nice to to connect to your home LAN?

In our walk-through above, we set up your VPN server so that everyone on your VPN has access to your home LAN. But maybe you don’t trust your kid to keep his phone safe. Remember: If he loses that cell phone, he loses one of the keys to your VPN and if someone nefarious finds the key, he can connect to your VPN.

See Grant Only Dad Access to the Home LAN


Wrap-up

  • We took a $50 compter or an $80 router.
  • We installed a free Linux operating system.
  • We installed OpenVPN.
  • We used EasyRSA to generate our keys and certificates.
  • We installed a VPN client on our clients.
  • We imported the client configuration file.
  • We discussed auto-connect options.
  • We granted special permissions to a special user.

Learn More / Other Options

  • If you want more info, this book is an option.
  • It looks like this guy wrote a book which tells how to do the same thing as this blog posting. I haven’t read it, but if you need more details than I provide, it is an option.
  • This post describes using an Amazon server instead of a Raspberry Pi.
    • You can actually purchase the commercial OpenVPN Access Server in the AWS Marketplace.
    • Note that with AWS, you can set up a privacy-VPN, but it clearly isn’t going to let you access your home LAN!
    • Free lasts for a year. Then you have to start paying for your AWS. It is surprisingly cheap, if you’re a lightweight user. Consider pro/con of using comp-lzo (trading CPU time of compression vs network bandwidth).

Install and Configure an OpenVPN Server on Linux

Install

sudo apt-get update
sudo apt-get install openvpn

Copy Your Server Keys to the Production Directory

If you built your keys on a separate key generation machine:

  • Run these commands on your key generation machine (and select keys_raspivpn or your key directory, if you put your Pi VPN keys elsewhere):

      source vars
      ssh pi@raspi-vpn mkdir -p /home/pi/Packages/easy-rsa/keys
      dest=/home/pi/Packages/easy-rsa/keys
      scp $KEY_DIR/ca.crt  pi@raspi-vpn:$dest/
      scp $KEY_DIR/server*.crt  pi@raspi-vpn:$dest/server.crt
      scp $KEY_DIR/server*.key  pi@raspi-vpn:$dest/server.key
      scp $KEY_DIR/dh????.pem  pi@raspi-vpn:$dest/dh.pem
      scp $KEY_DIR/ta.key  pi@raspi-vpn:$dest/static-ta.key
      scp $KEY_DIR/crl.pem  pi@raspi-vpn:$dest/crl.pem
    
  • Then run this on your VPN server:

      export KEY_DIR=/home/pi/Packages/easy-rsa/keys/
    

Regardless of where you built your keys, run these commands on the VPN server. Note that your ‘keys’ directory may be named ‘keys_raspivpn’ or ‘keys_raspivpn’, so you may have to alter the commands slightly):

sudo mkdir -p /etc/openvpn/server1
cd $KEY_DIR
sudo cp ca.crt  /etc/openvpn/server1/
sudo cp server.crt  /etc/openvpn/server1/
sudo cp server.key  /etc/openvpn/server1/
sudo cp dh.pem  /etc/openvpn/server1/
sudo cp static-ta.key  /etc/openvpn/server1/
sudo cp crl.pem /etc/openvpn/server1/
sudo chmod 700 /etc/openvpn/server1/
sudo chown -R root /etc/openvpn/server1

If you built your keys on a separate key generation machine:

  • Run these commands on your ‘‘Pi’’ (NOT the key generation machine!):
    • rm -r ~/Packages/easy-rsa/keys

Create the Server Configuration File

We’re going to create a setup for TCP connections. Once we get it working, we’ll copy it and modify the copy for UDP. In theory, UDP is better for a VPN because you’ll be running TCP inside your tunnel and you don’t want TCP on top of TCP because if you get delayed packets you’ll have both layers doing retransmits and it will make a mess. In practice, TCP often works better than UDP because firewalls sometimes don’t permit the UDP traffic. It looks to me like one popular 2Wire residential gateway takes a long time to clear the port after UDP, making reconnects problematic.

The copy will get a different:

  • port
  • protocol
  • subnet

The standard port for VPN is 1194. That’s what I use here. Some hotel and fast food WiFi will only let you make outbound connections to ports 80 and 443. I’m not running an HTTPS server, so I’m not using port 443 for that. I will configure my external router to forward from its external IP on port 443 to my VPN server on port 1194. (Let’s keep the weird port knowledge isolated to the router’s port-forwarding.)

Edit /etc/openvpn/server1/config.ovpn on your Pi as root. Make it contain:

# Run in daemon mode (send output to /var/log instead of stdout), label your output as 'server1'
daemon server1

# Run as a layer-3 VPN (IP, not Ethernet).
# If you care about tun/tap, see https://en.wikipedia.org/wiki/TUN/TAP
dev tun

# Use TCP instead of UDP and run on the standard port.
proto tcp-server
port 1194

# Tell OpenVPN where you put your certificates and keys.  ca=Certificate Authority; 
# cert=server certificate; key=server key; dh=diffie-helman (used to securely 
# exchange keys w/client); crl=Certificate Revokation List
ca /etc/openvpn/server1/ca.crt
cert /etc/openvpn/server1/server.crt
key /etc/openvpn/server1/server.key
dh /etc/openvpn/server1/dh.pem
crl-verify /etc/openvpn/server1/crl.pem

# Use HMAC, an *extra* key, used to authenticate the TLS handshake.  When the client makes its 
# initial connection to the server, if the client doesn’t pass it, the server doesn’t respond,
# protecting against some DDOS attacks.
# You must specify the key file and the encryption algorithm used to encrypt the key.
tls-auth /etc/openvpn/server1/static-ta.key 0
auth SHA256

# assign addresses to clients from the given network/netmask. The server will take the ".1" address
# TODO: CHANGEME if you run multiple servers.  Put one on 10.8.x.x and one on 10.16.x.x
server 10.16.0.0 255.255.255.0

# Use this encryption algorithm for VPN traffic
cipher AES-256-CBC

# Enable adaptive compression. Reduces data transmission. If your VPN server runs with high CPU, you
# might consider removing this. Setting it on the server compresses data leaving the server; setting
# it on the client compresses data leaving the client. Note that 'adaptive' uses a sampling
# interval, so if you download a zipped file, it will disable compression until the next sample.
comp-lzo adaptive
push "comp-lzo adaptive"

# Send keep-alives every 15 sec, so the connection won't drop.  If you don't see traffic for 60 sec,
# drop the connection.
keepalive 15 60

# If you don't do this, Tunnelblick on the Mac will append domain ".openvpn"
push "dhcp-option DOMAIN ."

# Permits multiple clients to connect using the same certificate at the same time.
# If you have one cert and you want to share it among all your clients, or you use the same cert for
# your PC and your cell, un-comment this.
#duplicate-cn

# What DNS server to use.
# You don't want to use the DNS provided where you're jacked-in or on public WiFi.  It might be
# compromised. Either provide the IP address of your home router/DNS, or use Google's public DNS.
# TODO: CHANGEME -- Use the value of the DNS server (probably home router) for YOUR network.
push "dhcp-option DNS 192.168.1.1"

# Make the VPN your default gateway router.  Send ALL traffic via the VPN (except the link-level
# frames your VPN tunnels inside).  def1 grants access to the LAN.  block-local blocks access to
# the LAN.  You want to block access to LAN when surfing at a cheesy open WiFi.
#push "redirect-gateway def1"
push "redirect-gateway block-local"

# Permit your VPN clients to see each other.
client-to-client

# Run the VPN under this user ID and group.
user nobody
group nogroup

# Write your log file here.
log /var/log/openvpn1.log

# Bigger numbers produce more log info.  Change this to 1 once you are happy with your VPN.
verb 3

# Retain the keys across VPN restart.  If you launch VPN as root, change to user nobody, and then
# you send a signal to the VPN to restart (as opposed to killing the process and re-launching),
# you won't be able to read the key files because they are root-only.  This solves that problem.
persist-key

# Don't close and reopen TUN device or run up/down scripts across SIGUSR1
# or --ping-restart restarts.
persist-tun

# Insist upon recent versions of TLS protocol because the older ones have been broken.
tls-version-min 1.2

#client-config-dir /etc/openvpn/server1/per-client-config

# Consider enabling this option briefly, to tune your MTU.  It take a few minutes (literally) at VPN
# startup, to empirically discover the best MTU. It writes results to your log file.
# So you would enable it, connect, check the log file, make your changes, and remove it.
# This is only permitted with UDP!
#mtu-test

STOP: You may need to edit these values in the file you just created – use YOUR network’s values for the following:

push "dhcp-option DNS 192.168.1.1"

Note: You’ll see a file /etc/openvpn/update-resolv-conf. I think this is used only if you run OpenVPN as a VPN client. We’re running it as a VPN server.


Start OpenVPN Daemon and Enable Autostart

Raspbian, like many recent releases of Linux, expects you to use ‘systemctl’. This replaces the ‘service’ command you may be familiar with. If you’re an old guy like me, it also replaces the SysV init and init.d that you understand.

The installed Raspbian+OpenVPN expects to find anything.conf in /etc/openvpn. I named my file config.ovpn and put it in /etc/openvpn/server1 to make it more like AsusWrt. To reconcile these:

sudo su
cd /etc/openvpn
ln -s /etc/openvpn/server1/config.ovpn server1.conf

To start OpenVPN for the first time:

systemctl start openvpn@server1.service

server1 must match up with ‘whatever-you-named-it.conf’ in /etc/openvpn. Since I named it ‘server1.conf’, I have to start openvpn@server1.conf.

Check to see if it started successfully. If it didn’t, fix any issues before proceeding:

cat /var/log/openvpn1.log

If it started, enable autostart, and reboot with

systemctl enable openvpn@server1.service
reboot

After reboot, check to confirm it is running:

ps -ef | grep openvpn

Back to Surf Safe at Starbucks

Basic Raspberry Pi Setup - Installing Raspbian

  • Summary: Assemble, copy image to SD, boot from SD, configure VNC, use VNC for more configuration, configure port forwarding on router, backup
  • Note to self: If you’ve done this once before, instead of re-installing, why not restore from your backup?

Assemble Your Pi

Buy a Raspberry Pi “kit” from someone like Amazon. Although you can buy a bare Pi for less, the kit should include:

  • Raspberry Pi computer board
  • Case
  • Power Supply
  • Micro SD Card (which will become your disk drive)

In addition to your Pi, you’ll need an SD card reader. Many laptops include a full-size SD card reader. You can use these if you get an adapter/sleeve which makes a Micro SD card fit the full size slot. If you have to buy a USB-based SD reader, expect to spend about $10.

The slowest piece of a kit will be the SD Card, and not the Pi. If you can afford it, spring for a really fast UHS-II U3 SD card or a not quite as fast UHS-I Class 10 SD Card. While this will cost more than your Pi, it will save you a boatload of time when writing to it.

Note that the Pi can’t actually drive UHS-I or UHS-II voltages, but getting the U3 speed rating will help on the Pi and your laptop will take advantage of UHS-II when it writes the OS image. The Class 10 card will be just as fast in your Pi, but maybe a little slower on your laptop. It is definitely cheaper. I’m using one of these.

You’ll need a PC or Mac to load Linux onto the SD card. I’m going to assume you are using a laptop. If you’re using a desktop, substitute ‘desktop’ wherever I say ‘laptop.’

Here are the basic steps, after you assemble your Pi:


Copy Image to SD

  • On your laptop, download Raspbian Jessie Lite from https://www.raspberrypi.org/downloads/raspbian/. These instructions are based on the version of January 11, 2017 (which uses Linux kernel 4.4).

  • Unzip it. This will give you a file named 2017-01-11-raspbian-jessie-lite.img.
  • Connect the SD card to your laptop.
  • If you are using a Windows PC see: Write Raspbian to SD Card from Windows
  • If you are using a Mac see: Write Raspbian to SD Card from Mac
  • If you are using a Linux PC, see Write Rapbian to SD Card from Linux.
  • Unplug the SD card from your laptop and insert it into the Raspberry Pi.
    • Be careful. On my Pi, it is easy to miss the connector inside the slot, and then the SD card falls into the case. Then you have to remove the case to fish out your SD card.

Boot and Configure for VNC

  • Connect power to your Raspberry Pi. Wait a minute for it to boot.
    • Connect to your Pi via ssh from your laptop. You might have to check your router’s list-of-clients page, to see what IP address has been assigned to your Pi.
    • If you get “Connection refused” and you are certain you created the ssh file, wait another minute and try again. It takes a while for sshd to start on the initial boot.
    • Note that X-windows setup with Jessie Lite is touchy and prone to not working. Following the incantations below seems to work most of the time. I do want minimal X-windows available for when I need to run a gui program such as gparted. I’ll start/stop VNC manually, since I don’t want X always running.
  • Login to your Pi via ssh with user/pass = pi/raspberry
  • Use the passwd command to change your password from raspberry to your favorite unix password.
  • You might consider enabling ssh Without Password.
  • If you are in Eastern Time, append this to your ~/.profile. If you’re in another time zone, choose a value more suitable for your locale:

      export TZ=EST5EDT
    
  • Run these ONE AT A TIME to avoid X problems. Even tiny variations have messed up xterm:

      sudo apt-get update
      sudo apt-get install vnc4server
      sudo apt-get install openbox
      vnc4server
    
    • apt-get update ensures that Raspbian has the latest list of packages and updates. It doesn’t actually fetch packages. It just gets the list.
    • vnc4server is a VNC server. It lets you run a GUI remotely, instead of putting a keyboard and a monitor on your Pi.
    • openbox is a window manager. It lets you do things like resizing windows.
    • Finally, we run the VNC server. This VNC server doesn’t play well with Mac OS X’s Screen Sharing, but the VNC server which does work well with Mac appears to be missing some prerequisites, so it doesn’t work unless you install+run this one first.

Use VNC to GUI-configure

  • Using your laptop and your favorite VNC client, connect to your Pi, confirm that you have an xterm. (If you are using a Mac, connect to vnc://raspi:5901.) Disconnect. Continue on your Pi.
  • Stop the VNC server and install one which works well with Mac and Windows clients:

      vnc4server -kill :1
      sudo apt-get install tightvncserver
    
    • Note: To start/stop VNC:
      • Start: tightnvcserver
      • Start in high res: tightvncserver -geometry 1920x1080 -depth 24
      • Stop: tightvncserver -kill :1
    • If you start a VNC session and you don’t see an X terminal, try right-clicking on the desktop. Also try waiting a minute - it is sometimes slow to launch.
  • Set up things so that running ‘vncserver’ will run tightvncserver. (The old /usr/bin/vncserver was a link to /etc/alternatives/vncserver.)

          sudo mv /usr/bin/vnc4server /usr/bin/vnc4server-hideme-kpk
          sudo rm /usr/bin/vncserver
          sudo ln /usr/bin/tightvncserver /usr/bin/vncserver
    
  • Allow root (superuser) to run X gui programs. Add this line to /etc/profile:

      export XAUTHORITY=/home/pi/.Xauthority
    
  • You’re going to want to grow your file system to fill the SD Card:

      sudo raspi-config
    
    • Select Advanced: Update this tool (scroll down, if necessary).
    • Select Advanced: Memory Split. Set video to 16. (Minimum.)
    • Select Set host name and change it to raspi.
    • Tell it to resize the partition to max size.
    • Exit and reboot.
  • Check to ensure the resize worked. Connect via VNC. Then use the GUI tool gparted:

      sudo apt-get install gparted
      sudo gparted
    
    • Review the display: /dev/root ought to have lots of free space. /boot is used just as a boot partition and is very small.
    • Exit gparted.
    • Exit VNC.
  • From an ssh session to your raspi, update all packages (does not upgrade the OS to a next release) and reboot. Note: I got a big notice about updated certificates, and it asked me to press “q” to quit. I did. I assumed it was just to quit displaying the notice.

      sudo apt-get dist-upgrade
      sudo reboot
    

Configure IP Address Assignment on Your Router

  • Configure your router so that it always assigns the same IP address to your Pi. I can’t tell you how to do this (unless you have the same router that I do) because it is different on every model of router. Your router probably has a web-based interface for doing this. On my router, it lives under LAN » DHCP Server. If your router permits, you can also tell it that your Pi is named “raspi”, and then you can connect to “raspi” when you use SSH, instead of connecting to something like 192.168.1.136.

Backup

  • This next bit is optional. You’ve spent a lot of time building your Raspbian installation. If you ever need to re-install, you can save yourself from having to do all of this again by making an image of your drive as it is now. Then, when you need it, you can re-load that image instead of having to load the generic image and apply all of these updates. I’m going to tell how to do this for Mac. You can figure out how to do similar operations if you use Windows or Linux. Windows users see this Lifehacker guide.

    • Back up your SD card:
      • On the Pi, make as much of that image contain zeros as possible (to maximize compressiong in a following step). Note that zeroing your SD card will be slow if you have a large card. Also note that on a Mac, you use “4m” as the block size, but on many Linux systems it is “4M”. If you get “dd: bs: illegal numeric value”, try switching the upper/lowercase of your BS.

          sudo dd if=/dev/zero of=/boot/tmp-zero
          sudo rm /boot/tmp-zero
          dd if=/dev/zero of=/tmp/tmp-zero bs=4m
          rm /tmp/tmp-zero
          sudo shutdown -h now
        
      • Move the SD card to your Mac, and use the following, to figure out what disk number has been assigned. I’ll refer to the disk number with the place-holder ‘#’.

          diskutil list
        
      • Create an image using dd. Note that if you have installed pigz, it will compress faster than gzip (by using multiple cores). This takes about 1.3 hours for my 32 GB SD Card. You might want to try using /dev/rdisk# for the dd. It is reportedly faster, but I haven’t checked it to see whether it works.:

          diskutil unmountDisk /dev/disk#
          sudo dd bs=4m if=/dev/disk# | gzip > ~/raspi-backup-image-yyyy.mm.dd.gz
        
    • When you need to restore that image (BE SURE TO REPLACE TOKENS IN THE LINE BELOW). Note: If it tells you the disk is busy, try also unmounting its partitions: <img src=”/files/clock.jpeg” height=”150”; width=”150”; style=”float: right; margin: 0 0 10px 10px”; >

            diskutil list
            diskutil unmountDisk /dev/disk#
            sudo su
            gunzip -c ~kevin/jumbo/raspi-backup-image-yyyy.mm.dd.gz | dd bs=4m of=/dev/rdisk#
            ^d
            diskutil unmountDisk /dev/disk#
      
    • Note that writing to /dev/rdisk# took about 35 minutes. Writing to /dev/disk# took over 3 hours.
    • Restoring from the gzip to /dev/rdisk# took about 35 minutes.
    • If you restore from a backup, after you boot the Pi and ssh to it:
      • sudo apt-get update
      • sudo apt-get dist-upgrade
      • If any major updates get applied: sudo reboot

Back to Surf Safe at Starbucks