- Summary: Assemble, copy image to SD, boot from SD, configure VNC, use VNC for more configuration, configure port forwarding on router, backup
- Note to self: If you’ve done this once before, instead of re-installing, why not restore from your backup?
Assemble Your Pi
Buy a Raspberry Pi “kit” from someone like Amazon. Although you can buy a bare Pi for less, the kit should include:
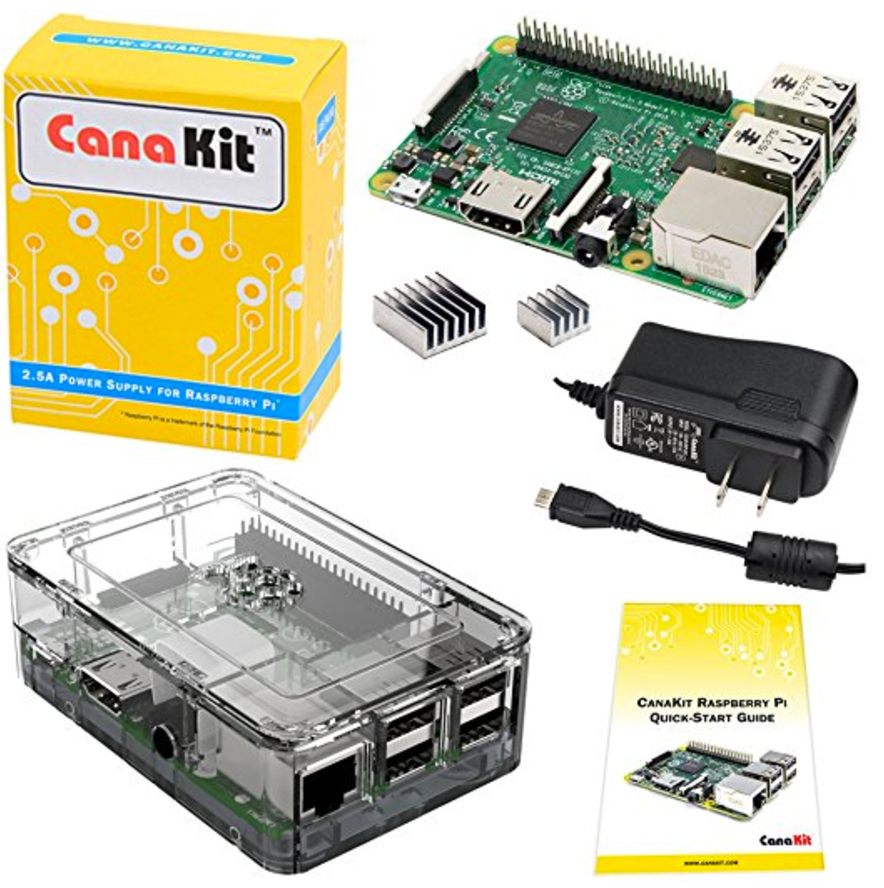
- Raspberry Pi computer board
- Case
- Power Supply
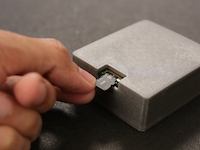
- Micro SD Card (which will become your disk drive)
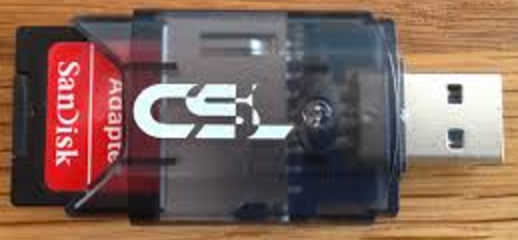
In addition to your Pi, you’ll need an SD card reader. Many laptops include a full-size SD card reader. You can use these if you get an adapter/sleeve which makes a Micro SD card fit the full size slot. If you have to buy a USB-based SD reader, expect to spend about $10.
The slowest piece of a kit will be the SD Card, and not the Pi. If you can afford it, spring for a really fast UHS-II U3 SD card or a not quite as fast UHS-I Class 10 SD Card. While this will cost more than your Pi, it will save you a boatload of time when writing to it.
Note that the Pi can’t actually drive UHS-I or UHS-II voltages, but getting the U3 speed rating will help on the Pi and your laptop will take advantage of UHS-II when it writes the OS image. The Class 10 card will be just as fast in your Pi, but maybe a little slower on your laptop. It is definitely cheaper. I’m using one of these.
You’ll need a PC or Mac to load Linux onto the SD card. I’m going to assume you are using a laptop. If you’re using a desktop, substitute ‘desktop’ wherever I say ‘laptop.’
Here are the basic steps, after you assemble your Pi:
Copy Image to SD
- On your laptop, download Raspbian Jessie Lite from https://www.raspberrypi.org/downloads/raspbian/. These instructions are based on the version of January 11, 2017 (which uses Linux kernel 4.4).
- Unzip it. This will give you a file named 2017-01-11-raspbian-jessie-lite.img.
- Connect the SD card to your laptop.
- If you are using a Windows PC see: Write Raspbian to SD Card from Windows
- If you are using a Mac see: Write Raspbian to SD Card from Mac
- If you are using a Linux PC, see Write Rapbian to SD Card from Linux.
- Unplug the SD card from your laptop and insert it into the Raspberry Pi.
- Be careful. On my Pi, it is easy to miss the connector inside the slot, and then the SD card falls into the case. Then you have to remove the case to fish out your SD card.
Boot and Configure for VNC
- Connect power to your Raspberry Pi. Wait a minute for it to boot.
- Connect to your Pi via ssh from your laptop. You might have to check your router’s list-of-clients page, to see what IP address has been assigned to your Pi.
- If you get “Connection refused” and you are certain you created the ssh file, wait another minute and try again. It takes a while for sshd to start on the initial boot.
- Note that X-windows setup with Jessie Lite is touchy and prone to not working. Following the incantations below seems to work most of the time. I do want minimal X-windows available for when I need to run a gui program such as gparted. I’ll start/stop VNC manually, since I don’t want X always running.
- Login to your Pi via ssh with user/pass = pi/raspberry
- Use the passwd command to change your password from raspberry to your favorite unix password.
- You might consider enabling ssh Without Password.
-
If you are in Eastern Time, append this to your ~/.profile. If you’re in another time zone, choose a value more suitable for your locale:
export TZ=EST5EDT -
Run these ONE AT A TIME to avoid X problems. Even tiny variations have messed up xterm:
sudo apt-get update sudo apt-get install vnc4server sudo apt-get install openbox vnc4server- apt-get update ensures that Raspbian has the latest list of packages and updates. It doesn’t actually fetch packages. It just gets the list.
- vnc4server is a VNC server. It lets you run a GUI remotely, instead of putting a keyboard and a monitor on your Pi.
- openbox is a window manager. It lets you do things like resizing windows.
- Finally, we run the VNC server. This VNC server doesn’t play well with Mac OS X’s Screen Sharing, but the VNC server which does work well with Mac appears to be missing some prerequisites, so it doesn’t work unless you install+run this one first.
Use VNC to GUI-configure
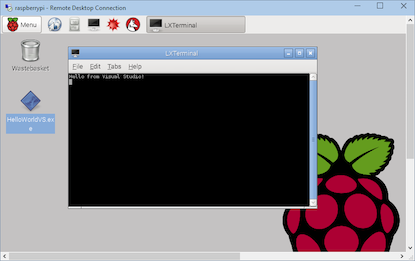
- Using your laptop and your favorite VNC client, connect to your Pi, confirm that you have an xterm. (If you are using a Mac, connect to vnc://raspi:5901.) Disconnect. Continue on your Pi.
-
Stop the VNC server and install one which works well with Mac and Windows clients:
vnc4server -kill :1 sudo apt-get install tightvncserver- Note: To start/stop VNC:
- Start:
tightnvcserver - Start in high res:
tightvncserver -geometry 1920x1080 -depth 24 - Stop:
tightvncserver -kill :1
- Start:
- If you start a VNC session and you don’t see an X terminal, try right-clicking on the desktop. Also try waiting a minute - it is sometimes slow to launch.
- Note: To start/stop VNC:
-
Set up things so that running ‘vncserver’ will run tightvncserver. (The old /usr/bin/vncserver was a link to /etc/alternatives/vncserver.)
sudo mv /usr/bin/vnc4server /usr/bin/vnc4server-hideme-kpk sudo rm /usr/bin/vncserver sudo ln /usr/bin/tightvncserver /usr/bin/vncserver -
Allow root (superuser) to run X gui programs. Add this line to /etc/profile:
export XAUTHORITY=/home/pi/.Xauthority -
You’re going to want to grow your file system to fill the SD Card:
sudo raspi-config- Select Advanced: Update this tool (scroll down, if necessary).
- Select Advanced: Memory Split. Set video to 16. (Minimum.)
- Select Set host name and change it to raspi.
- Tell it to resize the partition to max size.
- Exit and reboot.
-
Check to ensure the resize worked. Connect via VNC. Then use the GUI tool gparted:
sudo apt-get install gparted sudo gparted- Review the display: /dev/root ought to have lots of free space. /boot is used just as a boot partition and is very small.
- Exit gparted.
- Exit VNC.
-
From an ssh session to your raspi, update all packages (does not upgrade the OS to a next release) and reboot. Note: I got a big notice about updated certificates, and it asked me to press “q” to quit. I did. I assumed it was just to quit displaying the notice.
  sudo apt-get dist-upgrade
  sudo reboot
Configure IP Address Assignment on Your Router
- Configure your router so that it always assigns the same IP address to your Pi. I can’t tell you how to do this (unless you have the same router that I do) because it is different on every model of router. Your router probably has a web-based interface for doing this. On my router, it lives under LAN » DHCP Server. If your router permits, you can also tell it that your Pi is named “raspi”, and then you can connect to “raspi” when you use SSH, instead of connecting to something like 192.168.1.136.
Backup
-
This next bit is optional. You’ve spent a lot of time building your Raspbian installation. If you ever need to re-install, you can save yourself from having to do all of this again by making an image of your drive as it is now. Then, when you need it, you can re-load that image instead of having to load the generic image and apply all of these updates. I’m going to tell how to do this for Mac. You can figure out how to do similar operations if you use Windows or Linux. Windows users see this Lifehacker guide.
- Back up your SD card:
-
On the Pi, make as much of that image contain zeros as possible (to maximize compressiong in a following step). Note that zeroing your SD card will be slow if you have a large card. Also note that on a Mac, you use “4m” as the block size, but on many Linux systems it is “4M”. If you get “dd: bs: illegal numeric value”, try switching the upper/lowercase of your BS.
sudo dd if=/dev/zero of=/boot/tmp-zero sudo rm /boot/tmp-zero dd if=/dev/zero of=/tmp/tmp-zero bs=4m rm /tmp/tmp-zero sudo shutdown -h now -
Move the SD card to your Mac, and use the following, to figure out what disk number has been assigned. I’ll refer to the disk number with the place-holder ‘#’.
diskutil list -
Create an image using dd. Note that if you have installed pigz, it will compress faster than gzip (by using multiple cores). This takes about 1.3 hours for my 32 GB SD Card. You might want to try using /dev/rdisk# for the dd. It is reportedly faster, but I haven’t checked it to see whether it works.:
  diskutil unmountDisk /dev/disk#
  sudo dd bs=4m if=/dev/disk# | gzip > ~/raspi-backup-image-yyyy.mm.dd.gz
-
-
When you need to restore that image (BE SURE TO REPLACE TOKENS IN THE LINE BELOW). Note: If it tells you the disk is busy, try also unmounting its partitions: <img src=”/files/clock.jpeg” height=”150”; width=”150”; style=”float: right; margin: 0 0 10px 10px”; >
diskutil list diskutil unmountDisk /dev/disk# sudo su gunzip -c ~kevin/jumbo/raspi-backup-image-yyyy.mm.dd.gz | dd bs=4m of=/dev/rdisk# ^d diskutil unmountDisk /dev/disk# - Note that writing to /dev/rdisk# took about 35 minutes. Writing to /dev/disk# took over 3 hours.
- Restoring from the gzip to /dev/rdisk# took about 35 minutes.
- If you restore from a backup, after you boot the Pi and ssh to it:
- sudo apt-get update
- sudo apt-get dist-upgrade
- If any major updates get applied: sudo reboot
- Back up your SD card: